How to install Windows 11 25H2 on an unsupported PC?
If you want to clean-install Windows 11 version 25H2 on a computer that does not support the operating system officially, you need a handy tool called Rufus. It is a popular drive-making utility that lets you create a bootable USB and remove Windows 11’s hardware requirements and some of its annoyances, such as the mandatory Microsoft Account.
- Go to the official Rufus website and download its installer or the portable version.
- Run the downloaded file and allow the app to check for updates.

- If you do not have the ISO file for Windows 11 25H2, you can click the arrow-down button next to the Create button and click Download instead. The app will prompt you to select a version, language, and edition. Select where to save the file and wait for Rufus to finish downloading it.
- Now grab a USB drive (8GB or more), connect it to your computer and select it from the Device drop-down list.
- Select “Disk or ISO image” and click Select.
- Find the downloaded Windows 11 25H2 image and leave everything as is.
- Click Start.
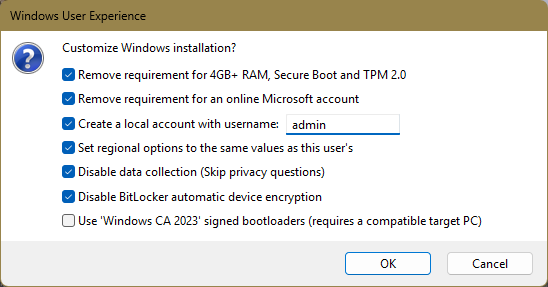
- Now, the most important part: Tick the “Remove requirement for 4GB+ RAM, Secure Boot, and TPM 2.0” option. You can also select additional options, such as turning off mandatory BitLocker, creating a local account, etc.
- Wait for Rufus to write the ISO to your USB.
- Now, you can install Windows 11 25H2 on your unsupported PC as usual. Alternatively, you can open the USB and click setup to perform an in-place upgrade.
Use USB to upgrade to Windows 11
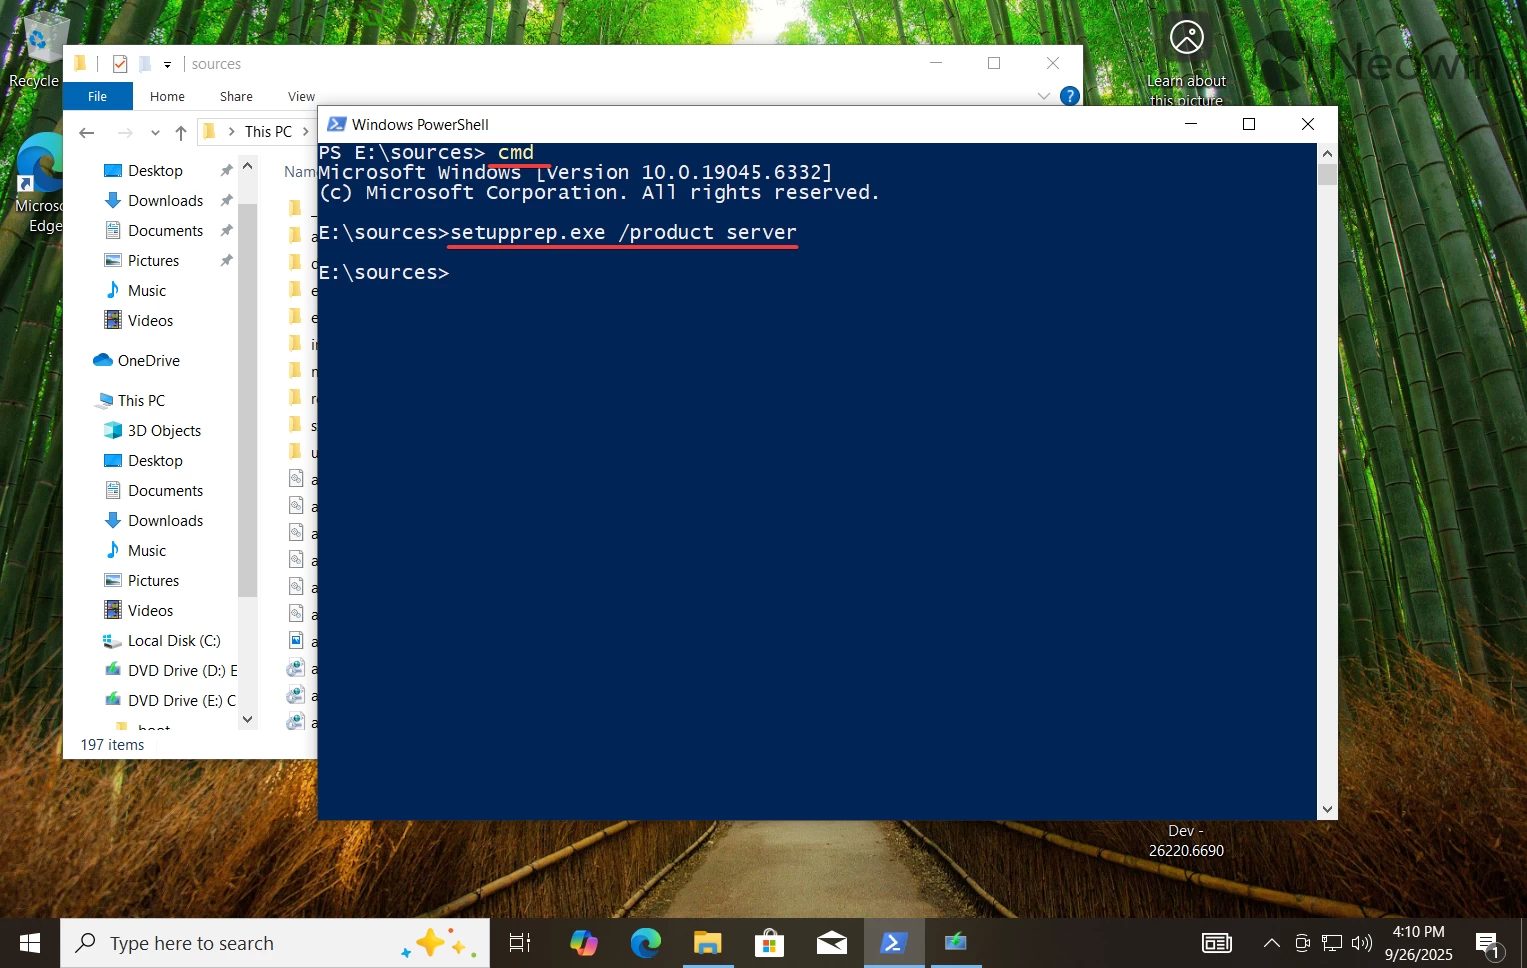
- Open the mounted USB and go to the sources folder.
- Press and hold the Shift key and right-click an empty space. Select Open PowerShell here.
- Type cmd in the PowerShell window and press Enter.
- Type setupprep.exe /product server and press Enter. Explainer: This command tricks Windows into thinking you are installing Windows Server, and it skips the hardware requirements. Don’t fret, you are still getting a regular Home or Pro edition, depending on your current installation. The command is only necessary to bypass the requirements.
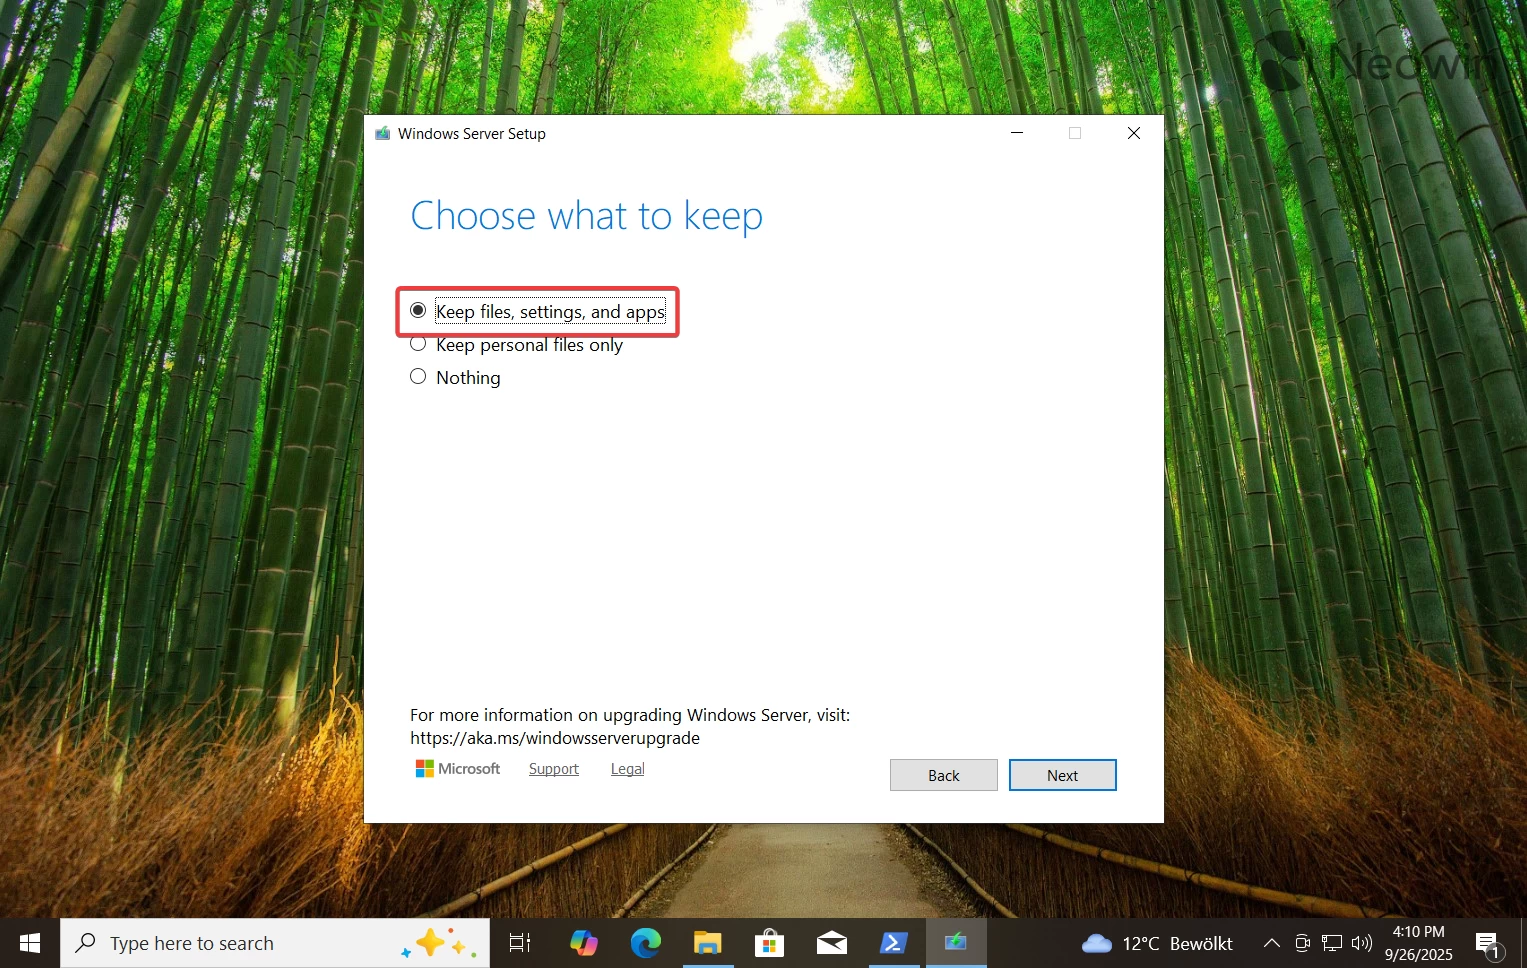
- Follow the on-screen instructions and select the necessary option on the “Choose what to keep” page. If you want to continue using your computer as is, select the first option.
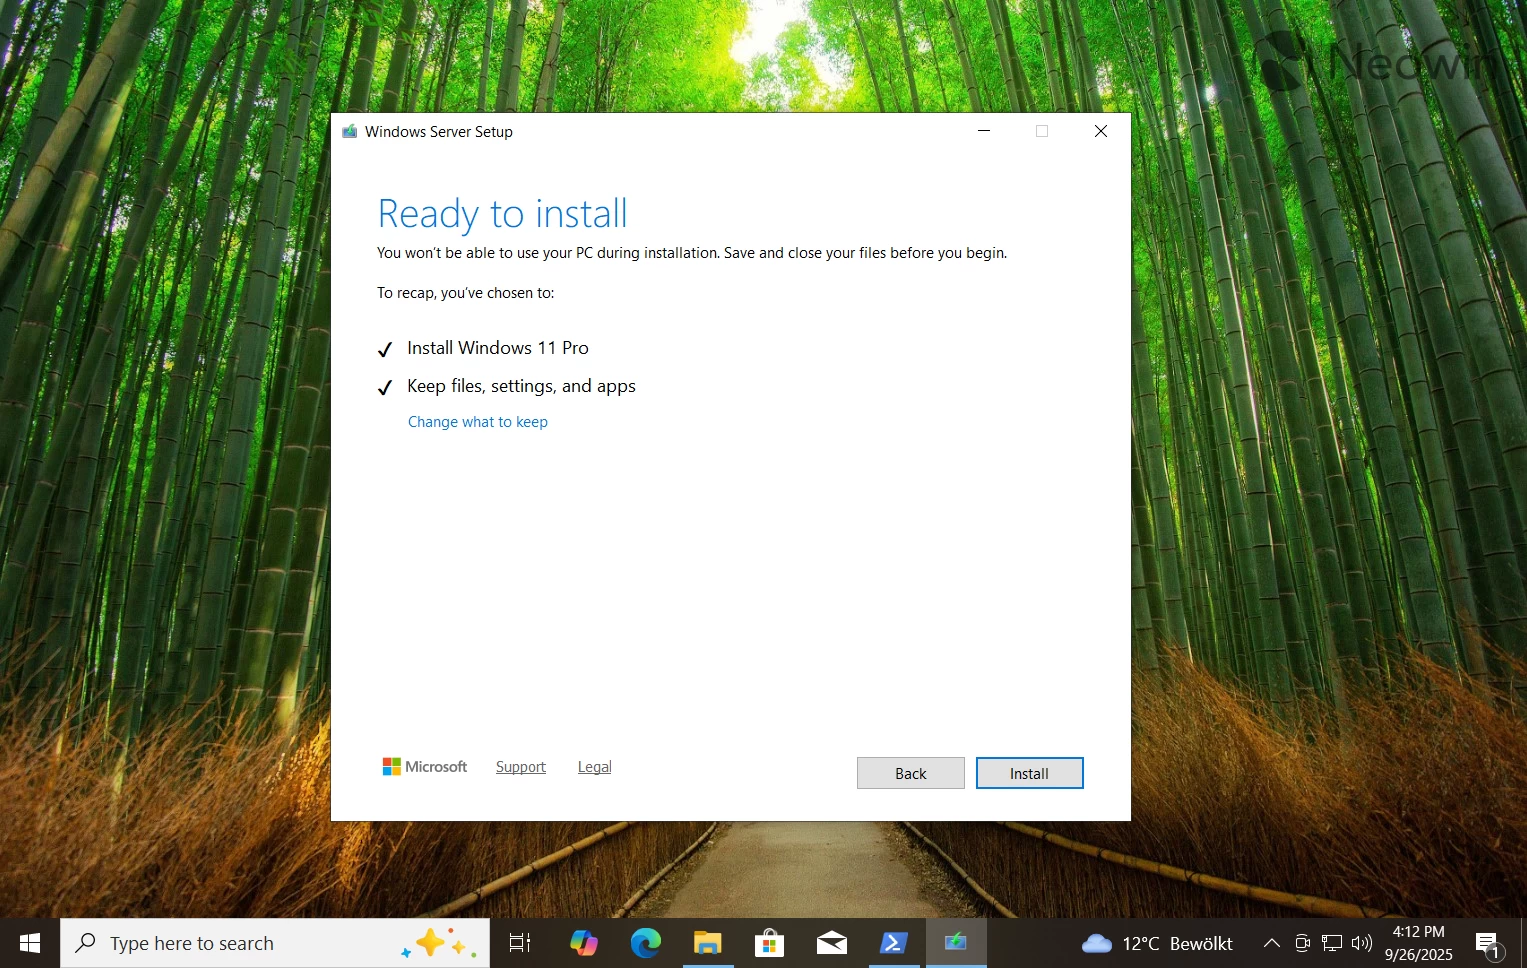
- Confirm the action and then sit back and wait for Windows 11 to install itself.